LiveSchools365 Role Training Kit — Finance
Trainer-grade · 2026-09-23 · ~30 min · https://liveschools365.com
USER TRAINING (not QA smoke).
1. Purpose
Run daily fees: structure, generate invoices, receive payment, and check records.
Business scenario
Month-end is tomorrow. You must confirm the fee structure, generate invoices for Grade 1, receive at least one practice payment, and produce a collection report the principal can trust.
Learning outcomes
- Complete the Accountant Implementation Guide track end-to-end (~30 minutes).
- Run daily fees: structure, generate invoices, receive payment, and check records.
- Use official menu paths instead of informal messaging for auditable school work.
- Know when to Mark done and how to resume from /implement or Trial Journey.
2. Sign in
- Login:
/school-management-software-login - User:
finance@liveschool - Password:
LiveSchool@123 - Guide:
/implement/accountant
3–4. Guided workflows
4.1 Find Fee Management
Main task: Reach the daily fee workspace
Why: All billing work starts from Fee Management under Finance.
Menu: Finance → Fee Management
Route: /fees
How to:
- Click Finance in the top menu.
- In the Finance side list, click Fee Management.
- You should see Fee Dashboard / Fee Entry options.
- Return here and Mark done.
Fields:
- Report parameters — Define the fee population and analysis scope.
- Export to Excel — Download the generated result with branding, metadata, parameters, and rows.
- Fee head — Name the charge category.
- Amount / frequency — Set charge value and recurrence.
- Campus / grade / section — Choose who receives the charge from Master Data grades and sections; students need not be registered yet.
Practice:
- Open live form: /fees
- Follow menu path: Finance → Fee Management
- Practice: bill Grade G01 / Section A for the current month; receive a small test payment
Expected: After this step, “Reach the daily fee workspace” is true on the live system, and the Implementation Guide step “Find Fee Management” can be Mark done.
Mistakes:
- If this step is skipped: All billing work starts from Fee Management under Finance.
- Generating invoices before fee structure exists → empty batch / zero challans.
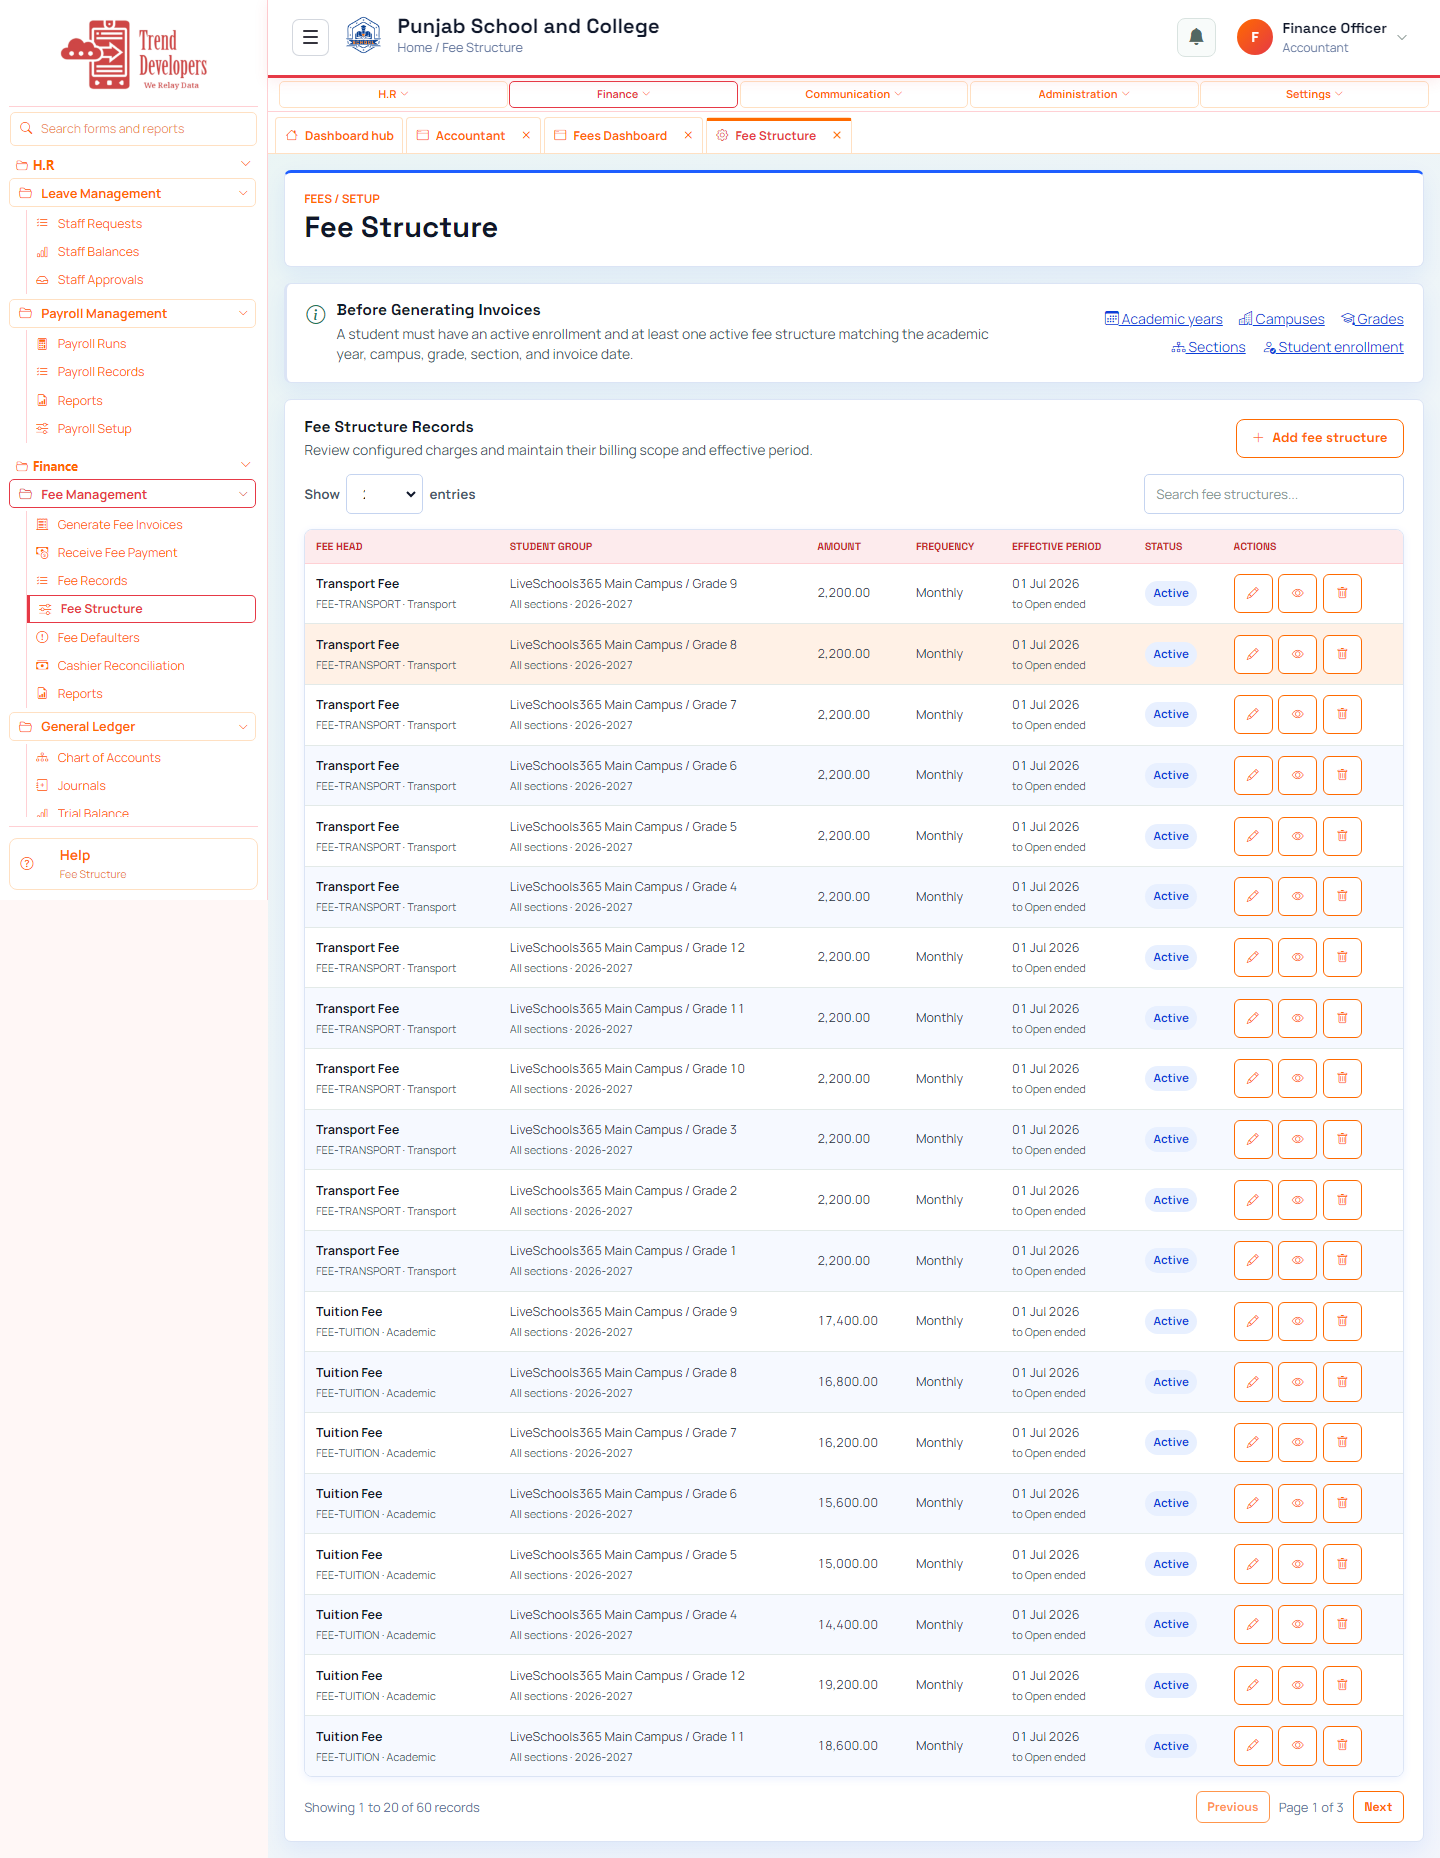
4.2 Confirm fee structure
Main task: Make sure charges exist before billing
Why: Generate Invoices uses the fee structure — empty structure means no challans.
Menu: Finance → Fee Management → Fee Structure
Route: /fees/setup
How to:
- From Fee Management open Fee Structure.
- Check that grades you bill have active charges.
- Add or fix missing fee heads if needed.
- Save, then Mark done.
Fields:
- Fee head — Name the charge category.
- Amount / frequency — Set charge value and recurrence.
- Campus / grade / section — Choose who receives the charge from Master Data grades and sections; students need not be registered yet.
- Active — Allow future billing use.
- Period name — Identify the accounting period.
Practice:
- Open live form: /fees/setup
- Follow menu path: Finance → Fee Management → Fee Structure
- Practice: bill Grade G01 / Section A for the current month; receive a small test payment
Expected: After this step, “Make sure charges exist before billing” is true on the live system, and the Implementation Guide step “Confirm fee structure” can be Mark done.
Mistakes:
- If this step is skipped: Generate Invoices uses the fee structure — empty structure means no challans.
- Generating invoices before fee structure exists → empty batch / zero challans.
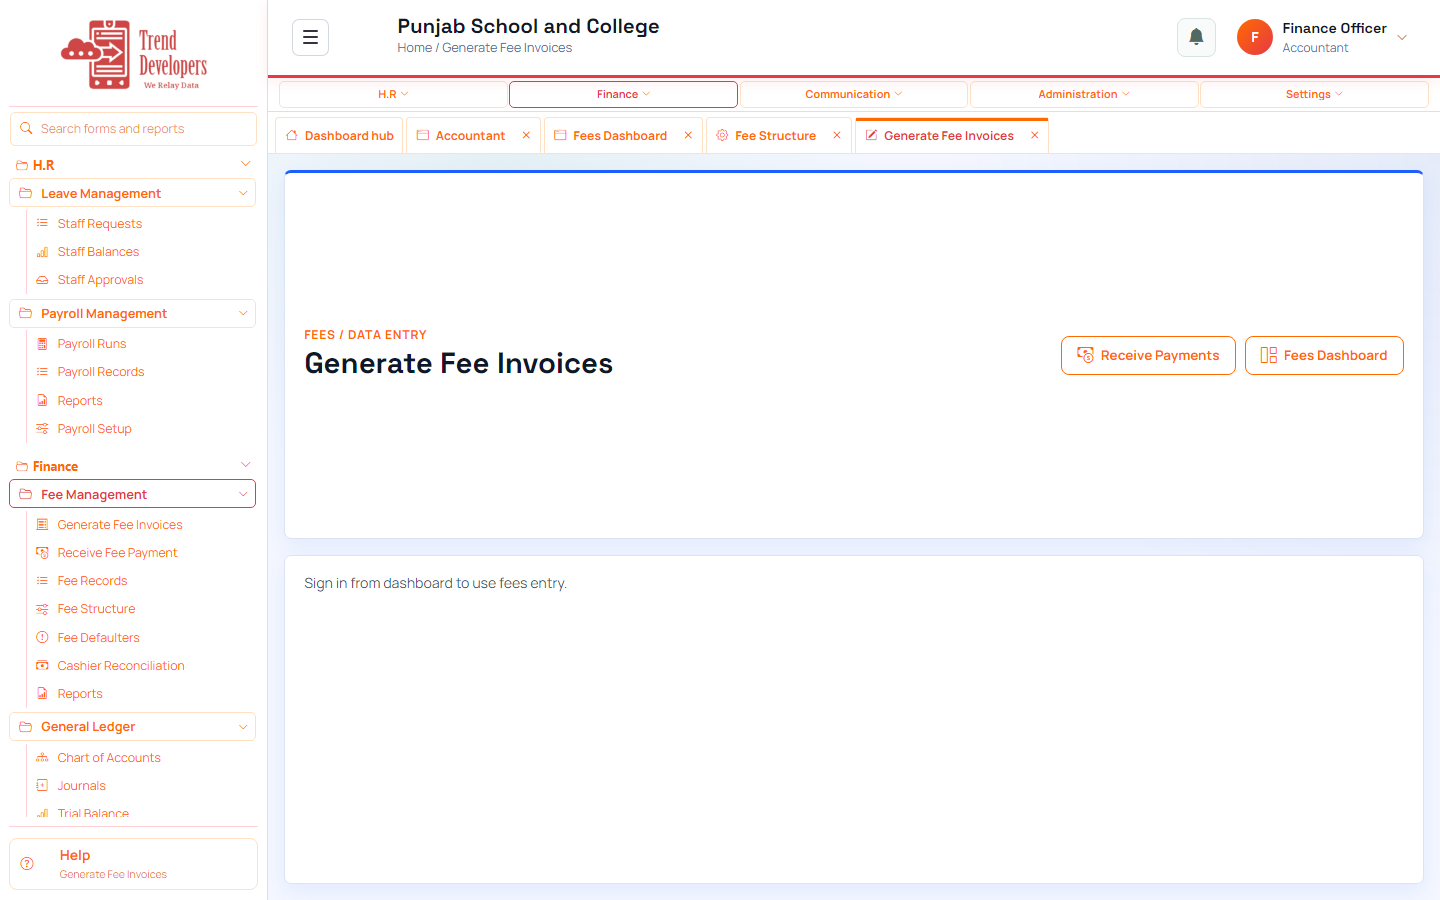
4.3 Generate fee invoices
Main task: Create monthly challans for a class or campus
Why: This is how students get bills for the month — do this before collecting cash.
Menu: Finance → Fee Management → Fee Entry → Generate Invoices
Route: /fees/entry
How to:
- Open Finance → Fee Management → Fee Entry.
- Select the Generate Invoices workflow (not Receive Payment yet).
- Choose billing session / academic year if asked.
- Select campus, grade, section, and billing month as shown on the form.
- Review how many students will be billed.
- Generate the invoice batch.
- Confirm the batch appears in Invoice Generation Batches.
- Return here and Mark done.
Practice:
- Open live form: /fees/entry
- Follow menu path: Finance → Fee Management → Fee Entry → Generate Invoices
- Practice: bill Grade G01 / Section A for the current month; receive a small test payment
Expected: After this step, “Create monthly challans for a class or campus” is true on the live system, and the Implementation Guide step “Generate fee invoices” can be Mark done.
Mistakes:
- If this step is skipped: This is how students get bills for the month — do this before collecting cash.
- Generating invoices before fee structure exists → empty batch / zero challans.
4.4 Receive a payment
Main task: Record money against open invoices
Why: Cash, bank, or card collections must be allocated to invoices to clear balances.
Menu: Finance → Fee Management → Fee Entry → Receive Payment
Route: /fees/entry
How to:
- Stay on Fee Entry.
- Select Receive Payment.
- Search and select the student.
- Enter amount, payment mode, and reference if required.
- Allocate the payment to open invoices.
- Save / receive the payment.
- Return here and Mark done.
Practice:
- Open live form: /fees/entry
- Follow menu path: Finance → Fee Management → Fee Entry → Receive Payment
- Practice: bill Grade G01 / Section A for the current month; receive a small test payment
Expected: After this step, “Record money against open invoices” is true on the live system, and the Implementation Guide step “Receive a payment” can be Mark done.
Mistakes:
- If this step is skipped: Cash, bank, or card collections must be allocated to invoices to clear balances.
- Generating invoices before fee structure exists → empty batch / zero challans.
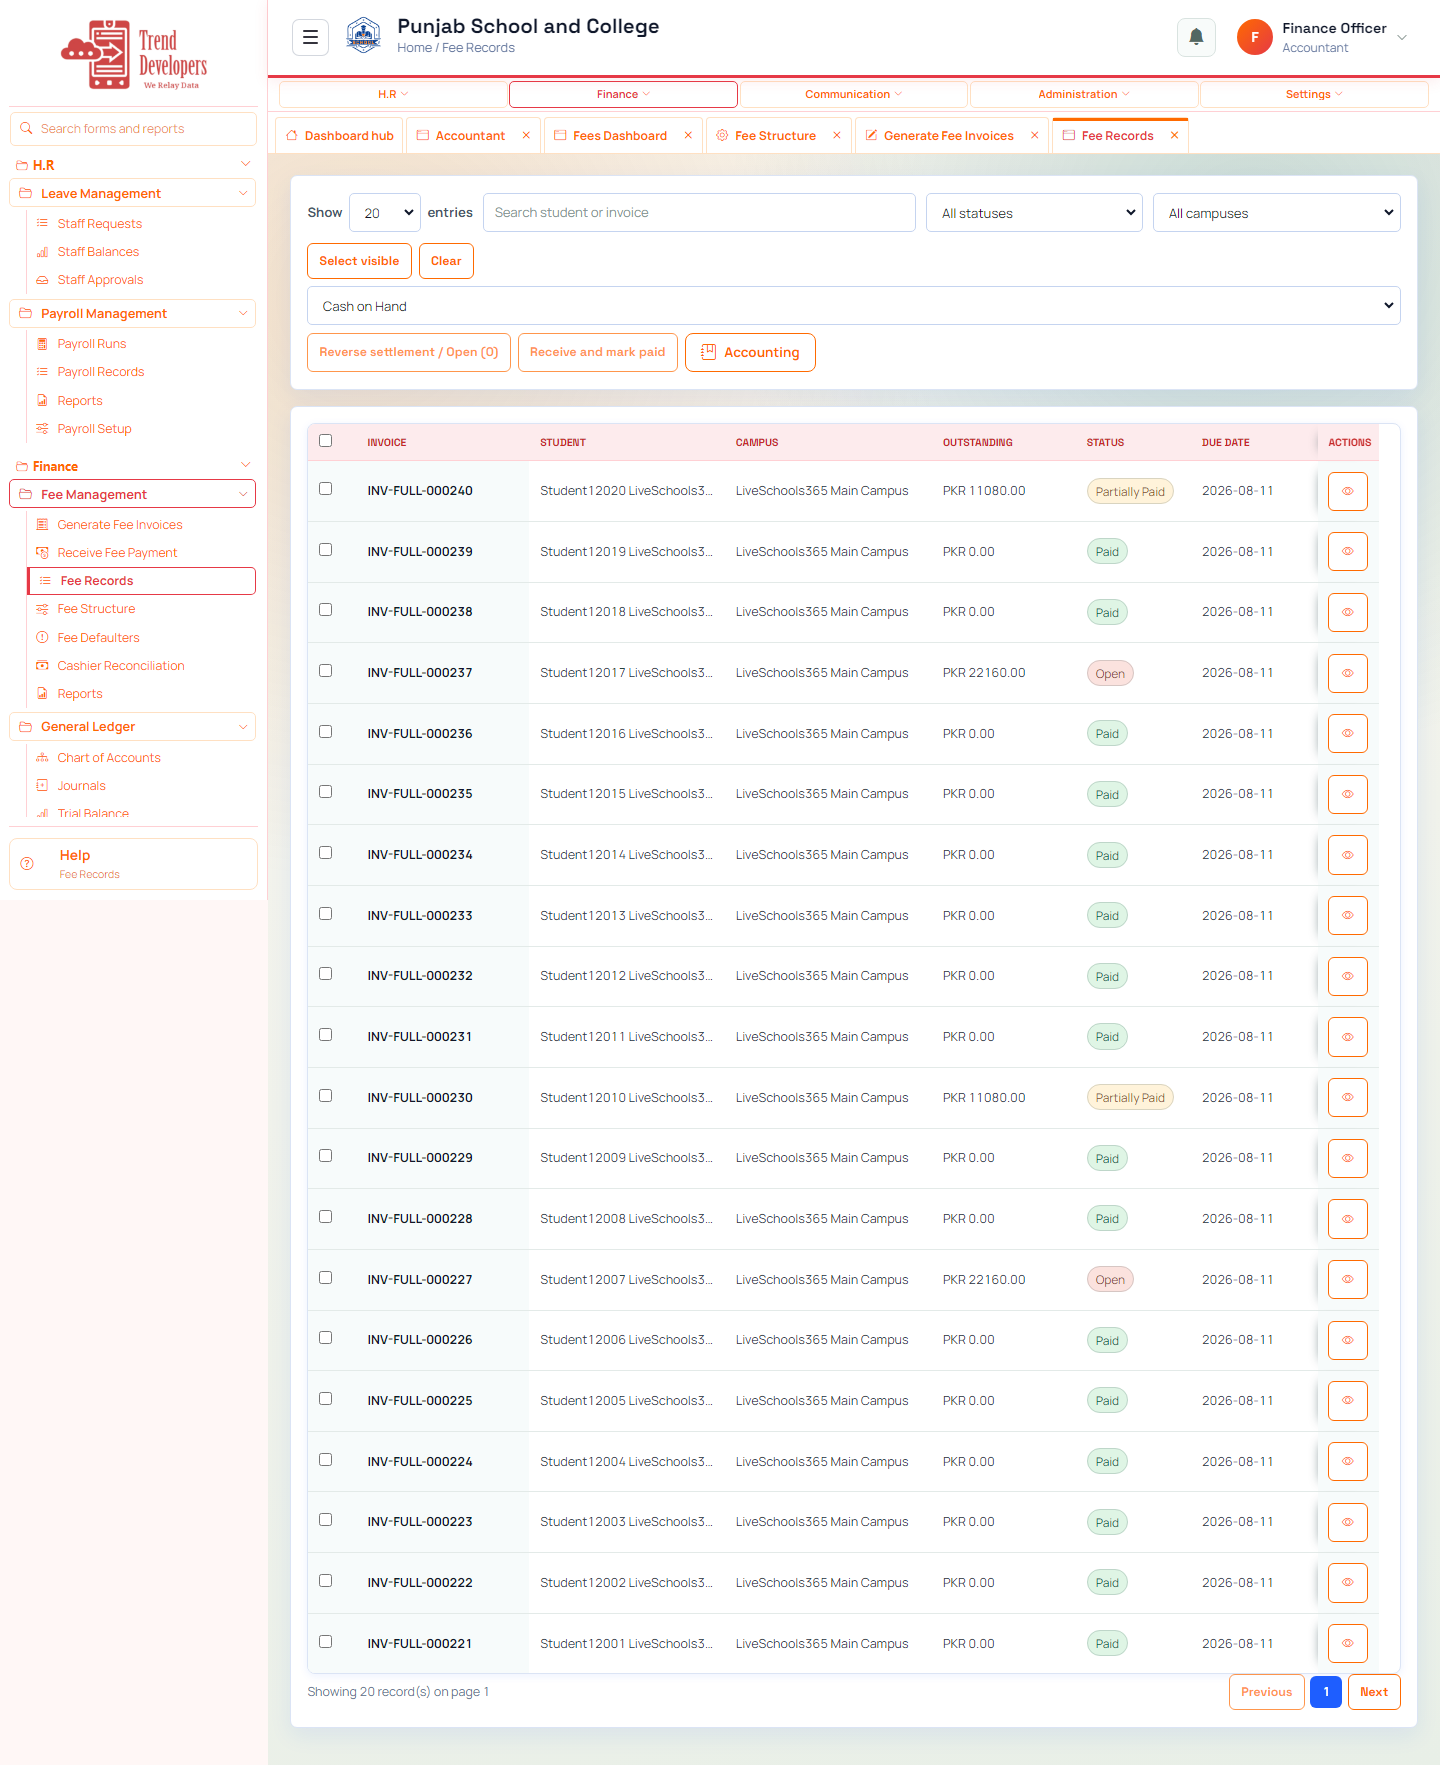
4.5 Review fee records
Main task: Verify invoices and receipts look correct
Why: Records are your audit trail before reports go to the principal.
Menu: Finance → Fee Management → Fee Records
Route: /fees/records
How to:
- Open Fee Records from Fee Management.
- Filter by campus or date if needed.
- Open one invoice and one receipt to confirm amounts.
- Mark done when the trail looks right.
Fields:
- Fee head — Name the charge category.
- Amount / frequency — Set charge value and recurrence.
- Campus / grade / section — Choose who receives the charge from Master Data grades and sections; students need not be registered yet.
- Active — Allow future billing use.
- Period name — Identify the accounting period.
Practice:
- Open live form: /fees/records
- Follow menu path: Finance → Fee Management → Fee Records
- Practice: bill Grade G01 / Section A for the current month; receive a small test payment
Expected: After this step, “Verify invoices and receipts look correct” is true on the live system, and the Implementation Guide step “Review fee records” can be Mark done.
Mistakes:
- If this step is skipped: Records are your audit trail before reports go to the principal.
- Generating invoices before fee structure exists → empty batch / zero challans.
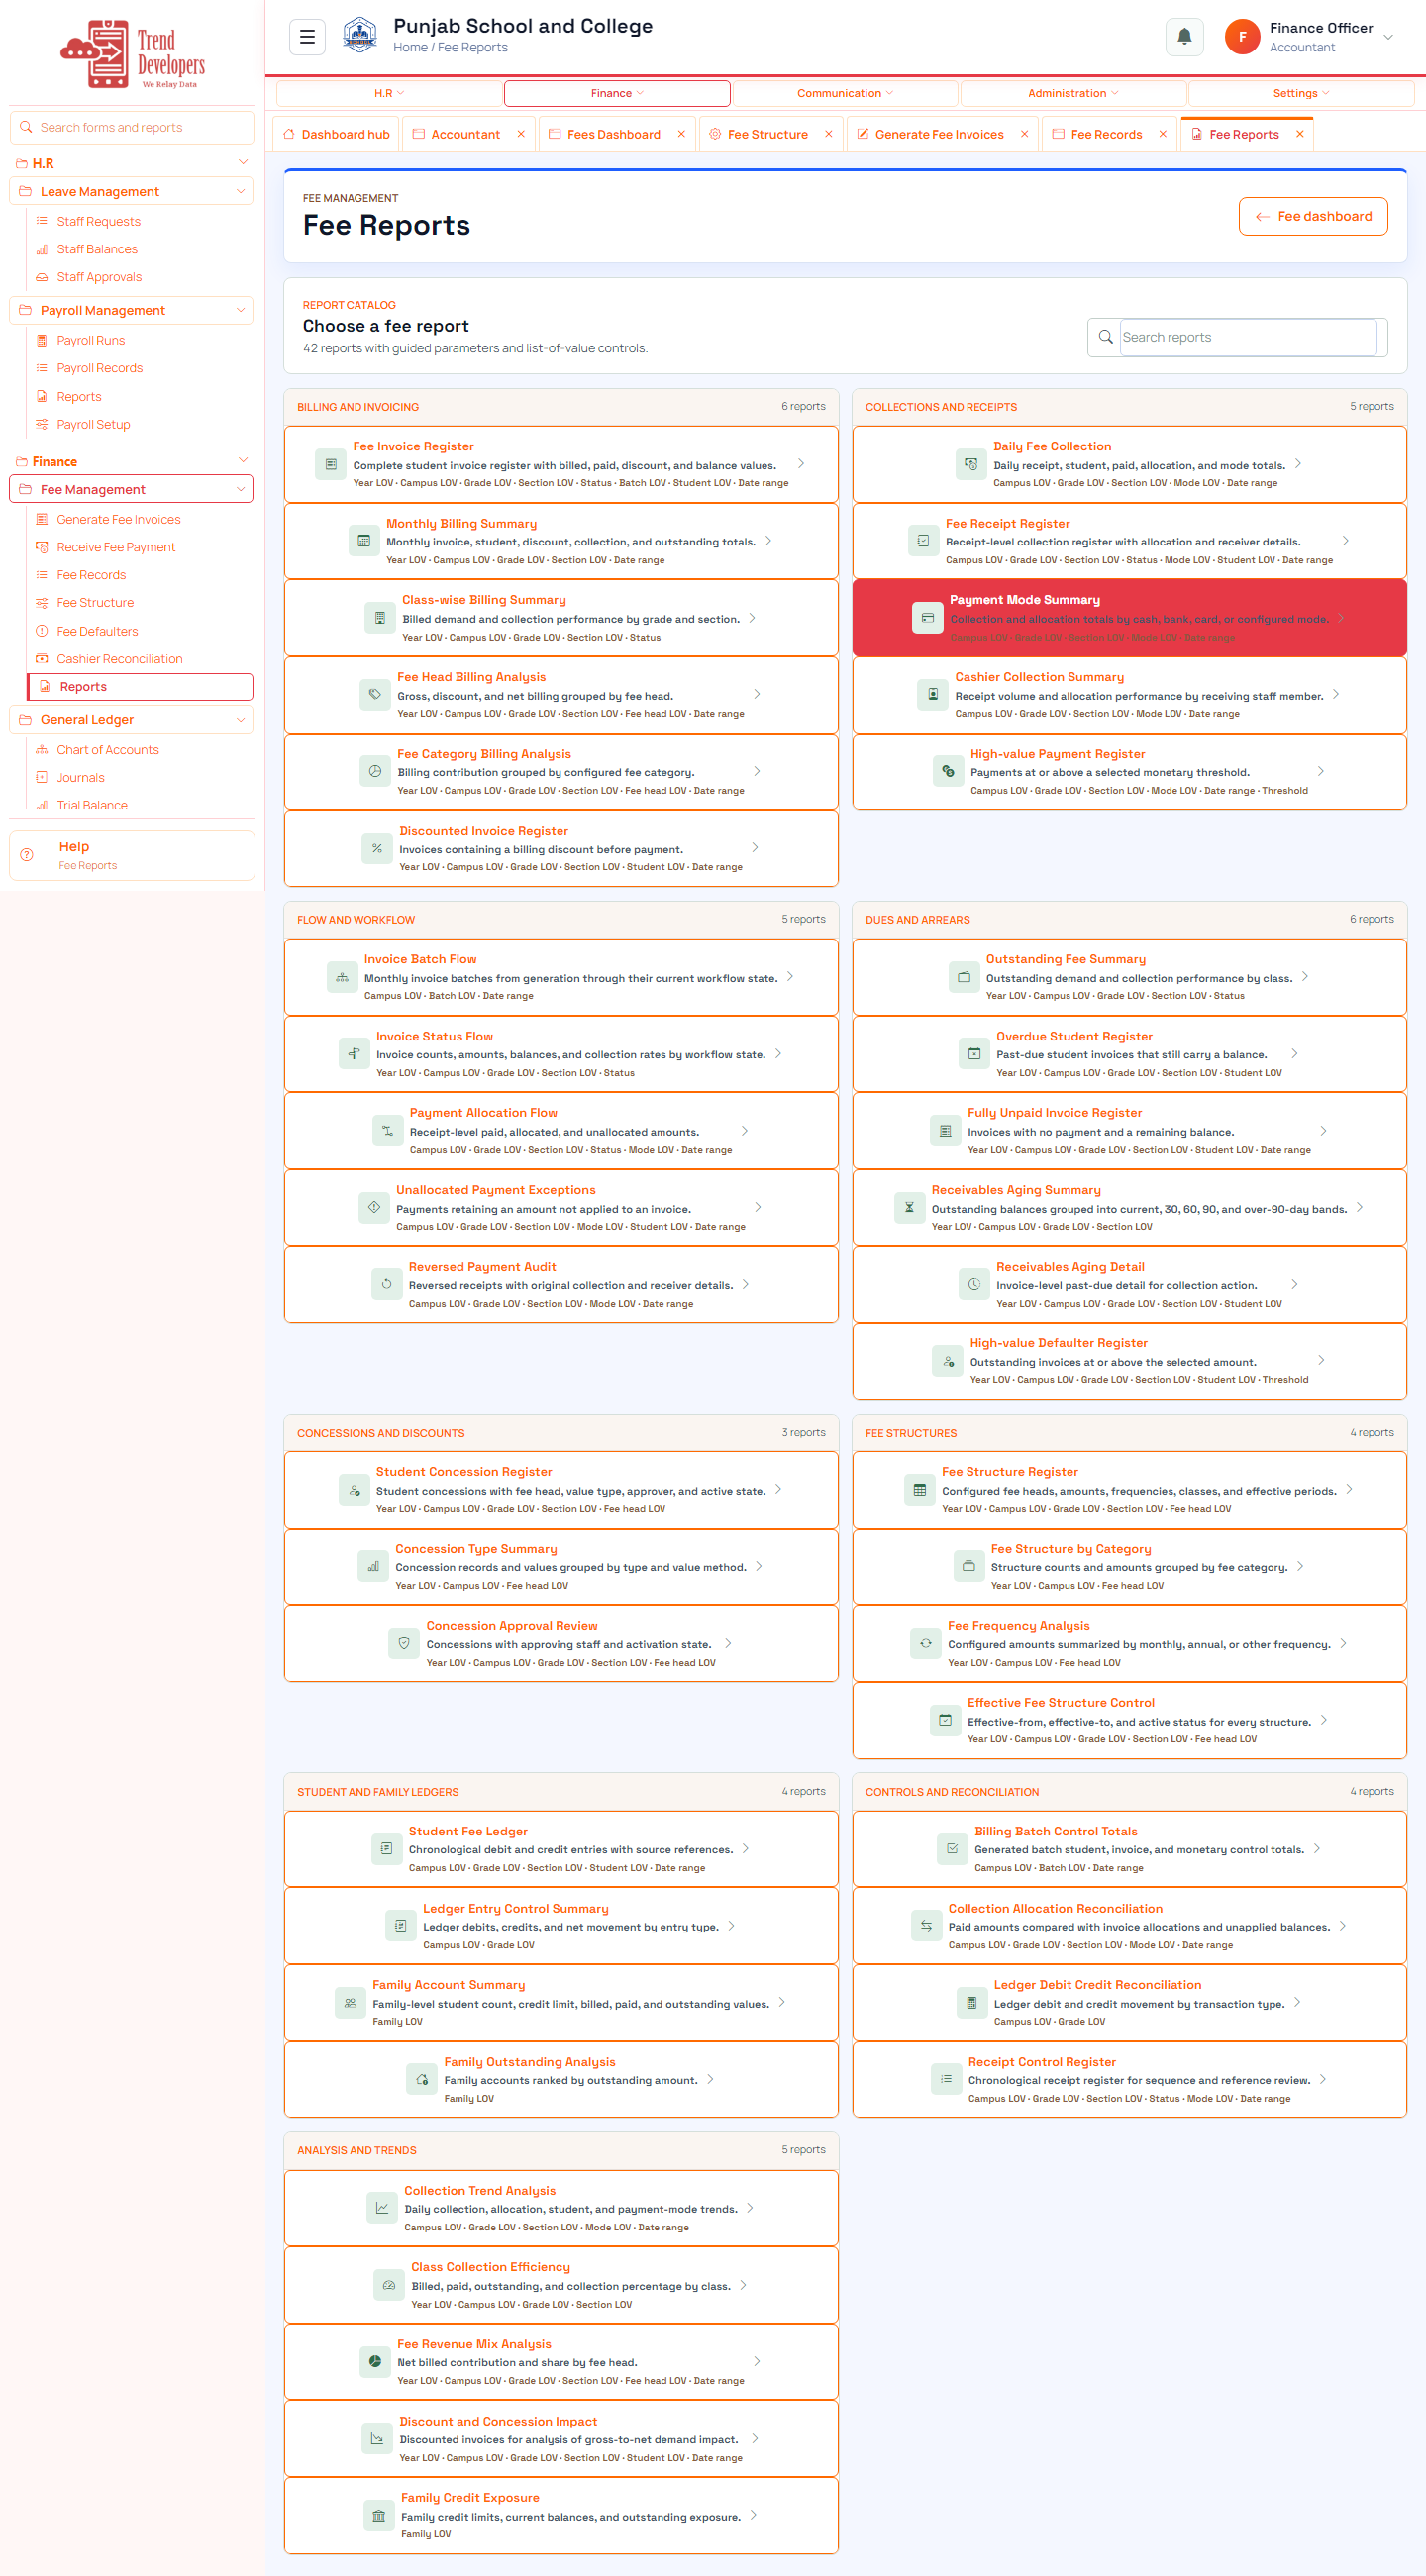
4.6 Run a fee report
Main task: Produce a report leadership can trust
Why: Reports summarize collections and outstanding balances for the day or month.
Menu: Finance → Fee Management → Reports
Route: /fees/reports
How to:
- Open Reports under Fee Management.
- Pick a collection or outstanding report.
- Set dates and campus.
- Run, then print or export.
- Mark done.
Fields:
- Report parameters — Define the fee population and analysis scope.
- Export to Excel — Download the generated result with branding, metadata, parameters, and rows.
- Fee head — Name the charge category.
- Amount / frequency — Set charge value and recurrence.
- Campus / grade / section — Choose who receives the charge from Master Data grades and sections; students need not be registered yet.
Practice:
- Open live form: /fees/reports
- Follow menu path: Finance → Fee Management → Reports
- Practice: bill Grade G01 / Section A for the current month; receive a small test payment
Expected: After this step, “Produce a report leadership can trust” is true on the live system, and the Implementation Guide step “Run a fee report” can be Mark done.
Mistakes:
- If this step is skipped: Reports summarize collections and outstanding balances for the day or month.
- Generating invoices before fee structure exists → empty batch / zero challans.
5. Capstone checklist
- □ Find Fee Management
- □ Confirm fee structure
- □ Generate fee invoices
- □ Receive a payment
- □ Review fee records
- □ Run a fee report
6. Knowledge check
Q: What is the first main task on the Accountant track?
A: Reach the daily fee workspace
Q: Which menu path opens “Find Fee Management”?
A: Finance → Fee Management
Q: Why does “Confirm fee structure” matter?
A: Generate Invoices uses the fee structure — empty structure means no challans.
Q: What happens if you finish a live form but do not Mark done?
A: Later Implementation Guide steps stay locked / progress is incomplete.
Q: Demo username for this kit?
A: finance@liveschool
7. Video